Wastin’ Time: Do your best to not get lost at sea with this ship in a bottle project

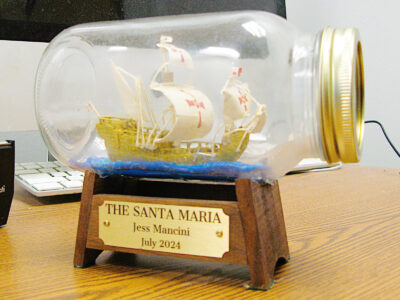
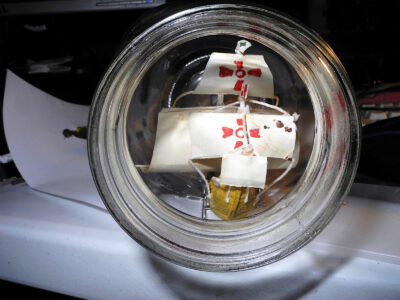
The Santa Maria sits on my desk at work. I made the walnut base from scrap and the plaque came from Ebay. The stand is attached to the jar with silicone. This was the hardest project I have ever tried and on a scale of 1 to 10, 10 being the best, I give it a negative 5. (Photo by Jess Mancini)
-
- The Santa Maria sits on my desk at work. I made the walnut base from scrap and the plaque came from Ebay. The stand is attached to the jar with silicone. This was the hardest project I have ever tried and on a scale of 1 to 10, 10 being the best, I give it a negative 5. (Photo by Jess Mancini)
-
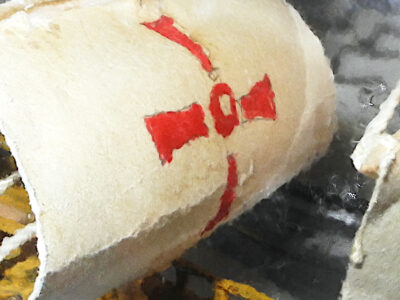
- I couldn’t get a more realistic look for the sails because I’ve never done it before. (Photo by Jess Mancini)
-

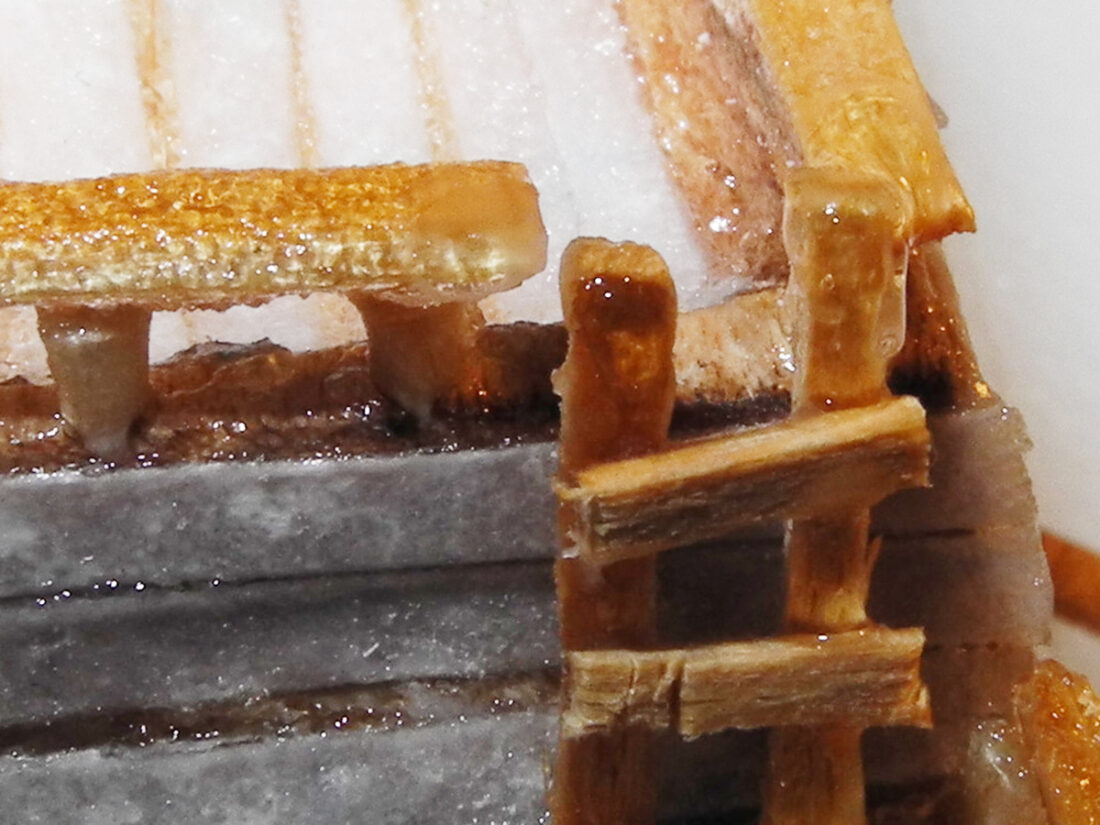
- I coated all the wooden parts with Super Glue to make them look wet. It also added strength to the model. (Photo by Jess Mancini)
-
- Modeling clay looks like the ocean. (Photo by Jess Mancini)
-
- I also made sure the sails were securely fastened. I made the masts from toothpicks and their length was determined by scaling the measurements from a full-size replica to the size of my model ship. (Photo by Jess Mancini)
-
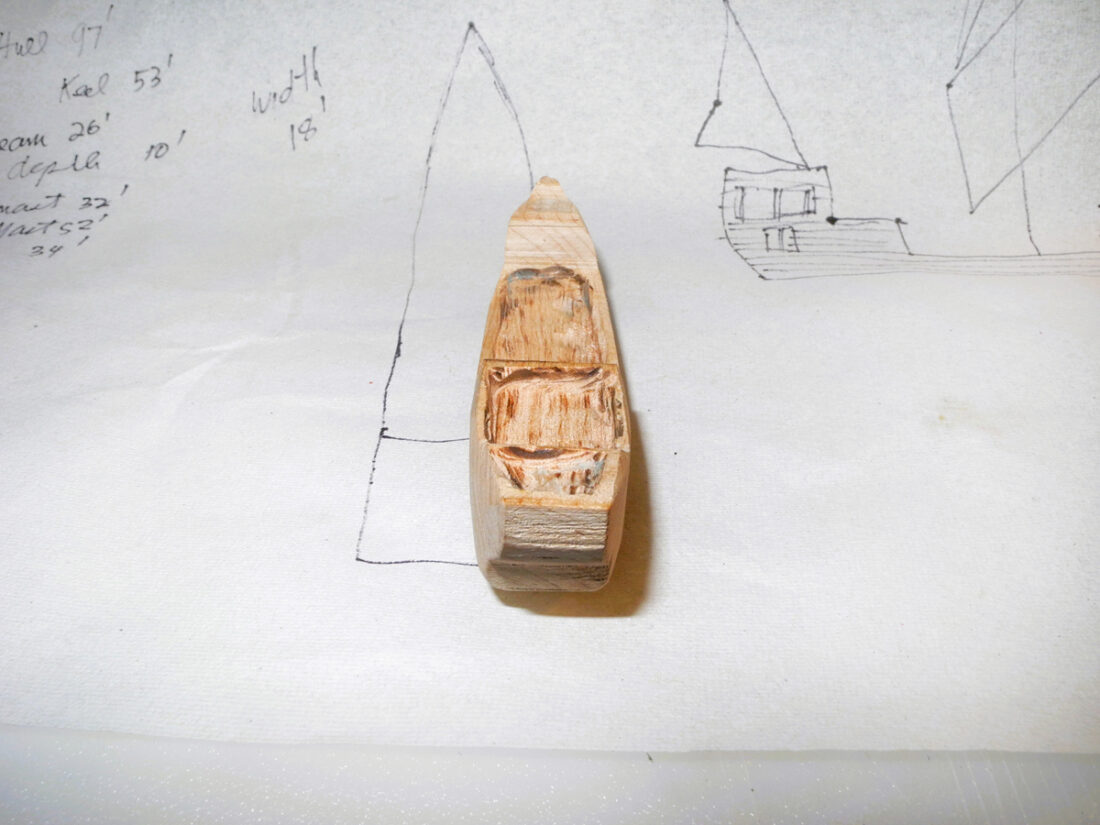
- I test fitted the ship in the jar, having learned a valuable lesson as explained in the other picture. (Photo by Jess Mancini)
-
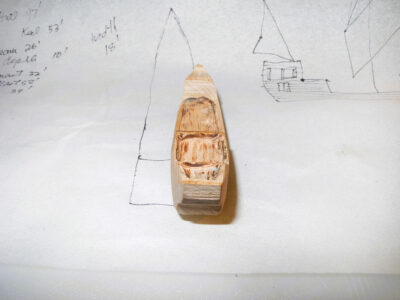
- Here’s the hull of the ship that I originally intended to go into a whisky bottle, but it was too big to fit in the hole. This is a lesson to measure twice and then measure again, just in case. (Photo by Jess Mancini)
That hasn’t stopped me before, so I watched a few videos on YouTube. I always suspected the masts were on some kind of hinge and the sails were loose and moveable while the ship is fed through the spout of the bottle. This was confirmed after watching a couple of how-to shows on YouTube.
That didn’t make it any easier and I have to say it’s a lot faster to empty the bottle than it is to fill it with a model ship.
Nonetheless, I found on the internet several schematics for the Santa Maria, my choice for the model and the largest of the three sailing ships in Christopher Columbus’ journey to America. I chose the Santa Maria because it is familiar to just about everyone who has gone to school and Columbus was like me, a poor Italian boy trying to earn a living.
After I found the plans, I copied them to a drawing program on my desktop computer and scaled the image to fit the spout of the former Old Granddad’s whisky bottle. The hole was about an inch, so I made the wooden model around 7/8 inch at its widest, based on the drawing program.

I couldn’t get a more realistic look for the sails because I’ve never done it before. (Photo by Jess Mancini)
I printed the top and side images of the schematic on my laser printer, which produced a clean crisp reproduction. I cut the two images with a scissor. One was placed on top of 2-by-2 inch maple stock and the other was placed on the side, each square to each other.
I cut the side first with one continuous cut on my scroll saw using the smallest blade I had, which I believe is about a sixteenth of an inch. After I cut the side, I reattached the waste piece so the blank would be square when I cut the top. With this method, I had the top and side profiles of the model. I don’t know if that’s the standard way. It’s the way I did it.
Using maple, in hindsight, was an error. The wood is too hard to carve. It’s possible perhaps with an experienced carver. I am not an experienced carver.
I used a Dremel with a tiny sanding drum to carve the model. After several hours of hand sanding, I was ready to glue tiny slivers of paper to resemble planks. This took a couple of days. I used Super Glue, and that was a mistake, too. It did not instantly dry and I got more on my fingers than the model. I should have used a wood glue, like the white wood glue at Harbor Freight. This is among the best brands of wood glues I have ever used and this is not a paid endorsement of the product. I think using a wood glue would have soaked into the paper and made it sticky enough to remain in place. I had to hold the slivers down with a knife point while the Super Glue dried enough so the paper remained in place.
After the glue dried, I thought I better try a test fit in the hole. I should have done it sooner. The model was too big and would not go through the hole. I didn’t want to sand the model to fit into the hole because then I would have to replank it. I almost dropped the project. After several expletives, I saw a Mason jar on a shelf I bought several years ago to can hot peppers. I bought the jar at the $1 store and didn’t trust it for canning, so I never used it.
I coated all the wooden parts with Super Glue to make them look wet. It also added strength to the model. (Photo by Jess Mancini)
The model easily fit in the jar. The sails and masts were another issue.
I then moved to the masts and sails. I used round toothpicks to make the masts, cutting them to scale and rounding the smaller masts to size using a sharp knife as a scraper. After I made those, I got index cards and soaked them in black coffee to stain them into looking old. I worried about the lines on the cards and wondered how I was going to make the sails without them showing. It turned out I didn’t have to worry about the lines. They disappeared after 24 hours in my coffee.
After the paper dried, I took a toothpick to draw the insignias on the sails, using red acrylic craft paint. This was harder than it sounds. It’s so small and I’m not known for miniaturization.
I finished the insignias after about an hour squinting and trying to move the toothpick as smoothly as I could. At least I tried.
I next assembled the sails and the masts. The smaller masts, and I apologize for not calling them by their maritime names, I glued to the model before I put it in the jar. Only the larger mast and sail would not fit and had to be assembled after the model was in the jar.

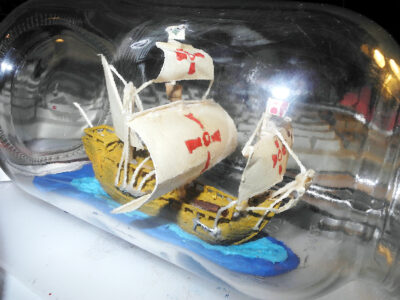
Modeling clay looks like the ocean. (Photo by Jess Mancini)
But before all of that, I used modeling clay to make the ocean and the foam from the wake of the ship. That wasn’t too hard, but I had to make the tools to fit into the jar to form the clay. It may be a Mason jar, but my hands wouldn’t fit into it.
After the sea was made, I put the model into the jar and glued it to the clay as best I could with Super Glue, the gel version. I must have done it right because it hasn’t come loose.
I then inserted the main mast and using forceps and long nose tweezers, I was able to put the mast into a pre-drilled hole and secure it with a dab of Super Glue using a tool made from a coat hanger to get around all the parts of the ship.
While everything in this project was difficult for me, attaching the string to the masts and sails was about as difficult as any other part of the project. It took several days to maneuver and glue the strings.
Cleaning the inside of the bottle was difficult, too. I must have spread some of the glue on the inside to the glass, which I didn’t see until it was dry. It came off with a paper towel wrapped around a small dowel, which I had to move without breaking off the sails.

I also made sure the sails were securely fastened. I made the masts from toothpicks and their length was determined by scaling the measurements from a full-size replica to the size of my model ship. (Photo by Jess Mancini)
Finally I was done with that and the ship was docked in the jar and looked pretty good to me, a first timer and an odd jobber Accomplished ship-in-bottle makers would laugh.
The next step was building a small base. I made the base from walnut which I ripped on my band saw and sanded to about 3/8 inch and finished with lacquer. When that was completed, I ordered a small brass plaque with the name of the ship, the year and month the model was made and my name so generations to come will know I made this.
If I had to rate it, the ship in a jar on a scale of 1 to 10, 10 the highest for craftsmanship, this would be a negative 5. Perhaps OK for a first timer, but amateurish for skilled ship-in-bottle makers.
***
Unless you think this column wasn’t enough of a waste of time, send ideas for “Wastin’ Time with Jess Mancini” to Jess Mancini at jmancini@newsandsentinel.com.

I test fitted the ship in the jar, having learned a valuable lesson as explained in the other picture. (Photo by Jess Mancini)
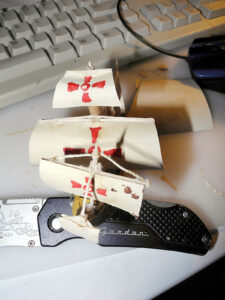
Here’s the hull of the ship that I originally intended to go into a whisky bottle, but it was too big to fit in the hole. This is a lesson to measure twice and then measure again, just in case. (Photo by Jess Mancini)
Local columns

Kiki’s Corner: Keep learning as much as you can

Mid-Ohio Valley Climate Corner: AI, data centers a dangerous spreading plague

Cracking the Code: Data centers solutions?
Wastin’ Time: Do your best to not get lost at sea with this ship in a bottle project

Editor’s Notes: Following the trail forward
