Wastin’ Time: Crafting your own rolling pin takes more than half-baked planning
-

- Me and the rolling pin. If I had to do it over, I wouldn’t have used the walnut in the pin. It may look decorative, but I don’t believe it adds to its effectiveness in rolling dough. (Photo by Jess Mancini)
-

- Sanding the rolling pin on the lathe. The reason there is no dust is I sand with WD-40 sprayed directly on the paper. (Photo by Jess Mancini)
-

- I turned two handles for the rolling pin. (Photo by Jess Mancini)
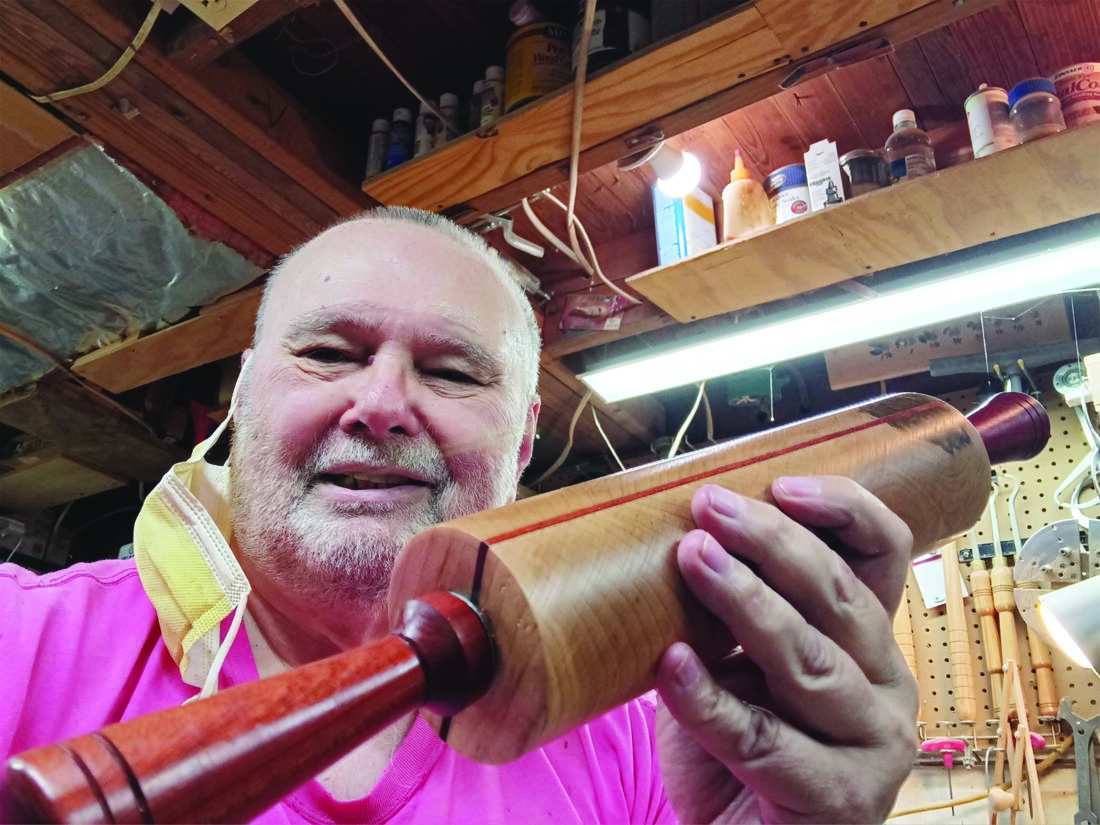
Me and the rolling pin. If I had to do it over, I wouldn’t have used the walnut in the pin. It may look decorative, but I don’t believe it adds to its effectiveness in rolling dough. (Photo by Jess Mancini)
I’m told a rolling pin is a good project for a beginning wood turner. Well, I’m not a beginner and it was among the hardest projects I have ever undertaken. I’ll explain as I go along.
First I prepared a blank of maple for the body of the rolling pin. I used the wood left over to make a cutting board, cutting two pieces into about 4-by-12 inches halves.
I had a 1/4-by-4 inch piece of walnut and placed that between the two halves. Why? I thought it would look nice, but looking back that did nothing for functionality. I make things to use, not to sit on a shelf and look pretty.
I glued the blanks using a waterproof glue, keeping them as square as possible, and let it sit clamped for two days for the glue to cure. Don’t be stingy with glue. You want it to fill all the space in between the blanks. When I don’t have glue squeezing from the joints, I worry I may not have used enough.
After the glue has dried, the next step was to drill a 1/4 inch hole through the entire length of the blank for the aluminum rod shaft. Besides being for the shaft, I would turn the blank by mounting it between centers using the holes at each end to square it on the lathe and to make sure the face of the pin was parallel to the hole.
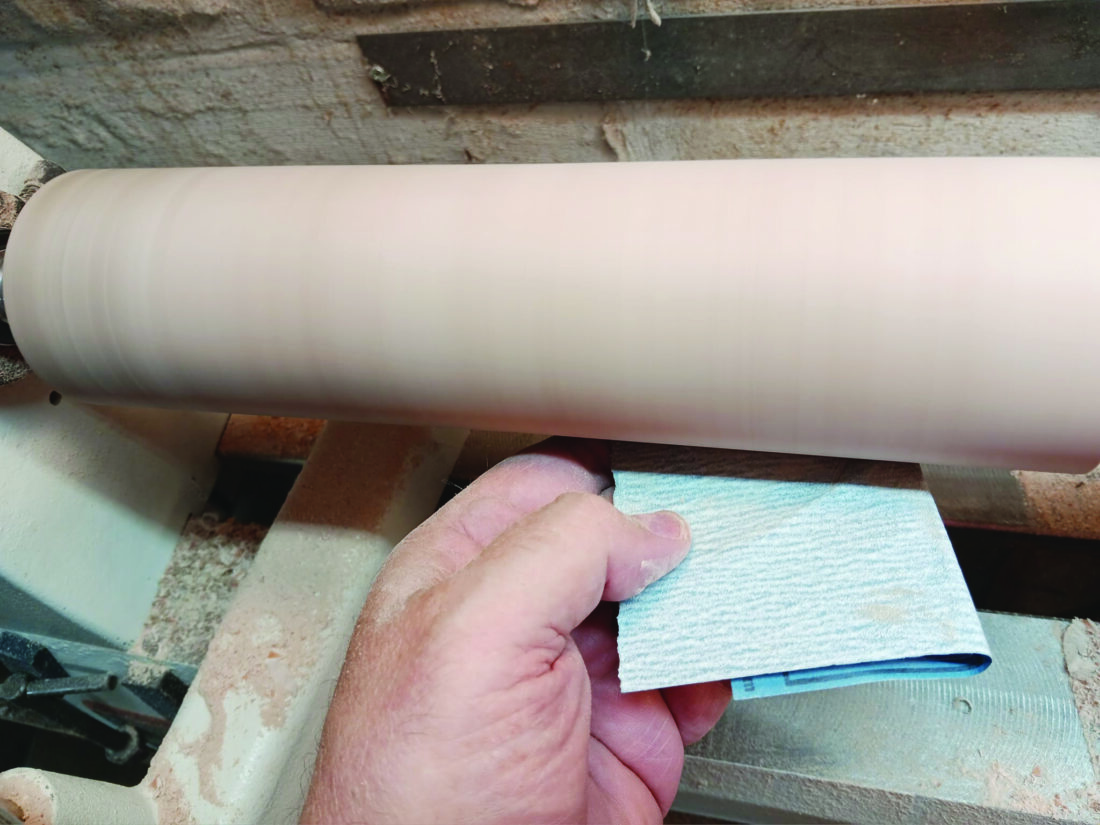
Sanding the rolling pin on the lathe. The reason there is no dust is I sand with WD-40 sprayed directly on the paper. (Photo by Jess Mancini)
Easier said than done. A bit will tend to drift as it bores through the grain. I used a drill press with a 12 inch long bit, drilling one end about half way, then turning the blank over and drilling in hopes of meeting the other hole, hoping they meet in the middle. I was skeptical it would work for me. It didn’t. I then put a 24 inch 5/16 bit on a hand drill and bored through the blank. The holes on one end were about a half inch apart. After several passes, the two holes met. I filled the errant hole with a dowel.
Since I used the leftover wood from the cutting board, the end grain composed half of the face of the rolling pin. It was difficult to turn. A parting tool used like a scraper worked best.
I finally got it to a diameter of about 3 1/2 inches, then sanded, and sanded, and sanded more. The end grain was difficult. I eventually turned to my belt sander, perhaps not standard operating procedure, but it worked.
The handles were easier. The difficulty for me was making them both the same. I got them close.
Before I turned the handles, I drilled a 1/4 inch hole on one end and mounted that side to the tailstock. The shaft is inserted into the hole and epoxied. I’m not sure of the species of wood for the handles. I think it is called blood wood and is red to brownish red.
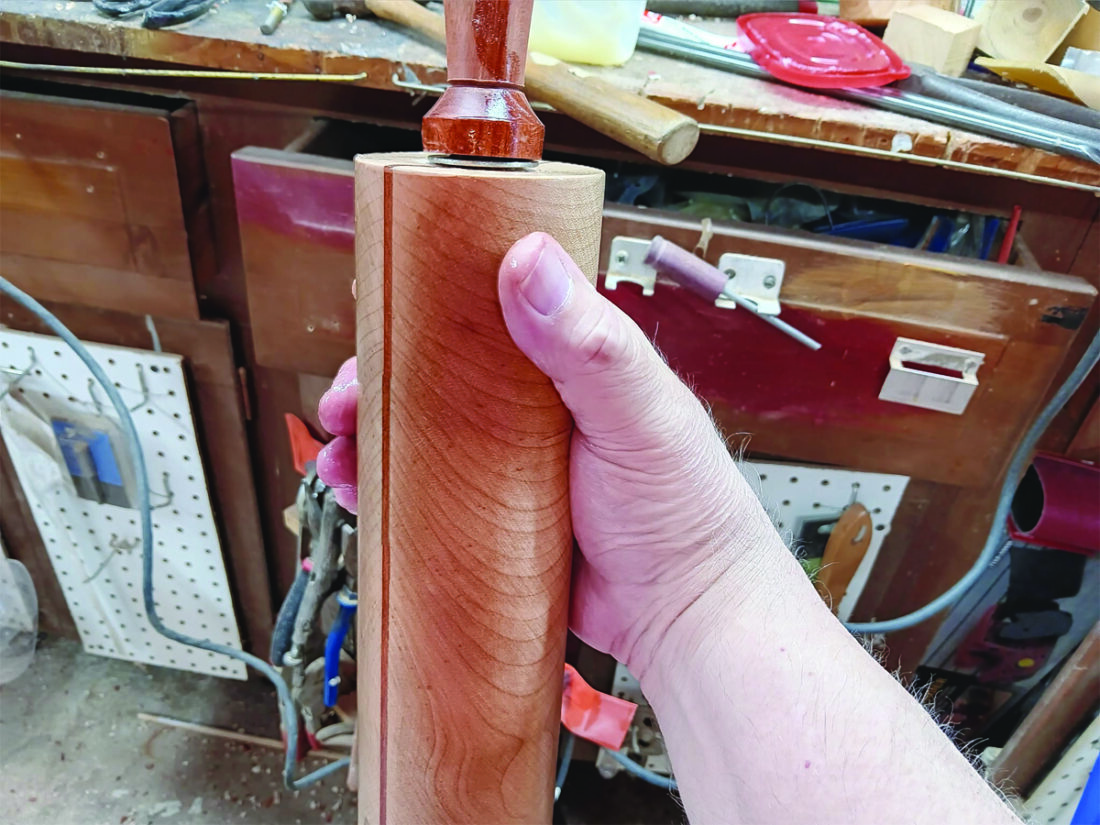
I turned two handles for the rolling pin. (Photo by Jess Mancini)
The parts to this version of the rolling pin is a 1/4 inch aluminum rod, two nylon bushings with quarter inch inside diameter and a half inch outside diameter. I drilled the inside diameter to 5/16 so the shaft would rotate freely in the bushing. It’s a rolling pin, not a precision piece of equipment. Between the handle and the pin I placed a stainless steel fender washer so I wouldn’t have wood on wood. I think a nylon washer would be better. The idea is to use parts that would not rust if contacted with water.
I enlarged the ends of the holes through the pin to a half inch to accommodate the bushing.
I assembled all the parts into the completed rolling pin, then sprayed it with water several times to raise the grain, sanding with a fine grit sandpaper in between spritzes. Raising the grain lessens the chance of the grain raising when you clean the rolling pin. I finished it with a mixture of beeswax and mineral oil. You can use that on a butcher block, too. I applied a generous coating of the finish and let it sit for several hours before wiping it off.
Hindsight is 20/20. I hope I’m not taking a simple project and overthinking the process and making it more complicated than it should be. It’s easy to make something complicated. Making something simple is the challenge. The simpler the process with fewer parts and steps, means less chances for mistakes.
Other methods are described on YouTube to attach a handle, such as turning a wood shaft as an axle for the handle and gluing it into the end of the pin or turning the handles as a physical part of the rolling pin. I could have made a French style rolling pin, which is a length of wood tapered at the ends. That would have been the easiest. I first wanted to use small bearings, but I only had one and couldn’t find others around town. I probably wasn’t looking in the right places.
Using bearings also would have involved drilling a hole through the length of the pin for a shaft. The next time, if there is a next time, I would drill the blank from one end to the other and not try to drill two holes with hopes of meeting in the middle or drill the hole on my lathe, the method I used in making a table lamp. If someone knows another way that works, let me know. If someone knows another way to attach handles that rotate, let me know that, too. I don’t know everything, but you probably already know that.
***
Unless you think this column wasn’t enough of a waste of time, send ideas for “Wastin’ Time with Jess Mancini” to Jess Mancini at jmancini@newsandsentinel.com.
Local columns

Letter to the Editor: Where is your attention?

Mid-Ohio Valley Climate Corner: The problem(s) with plastic
Wastin’ Time: Crafting your own rolling pin takes more than half-baked planning

Editor’s Notes: There is much to celebrate

Cracking the Code: It’s about time
