The Crochet Lady: How to flake it ’til you make it with this fun seasonal project
-
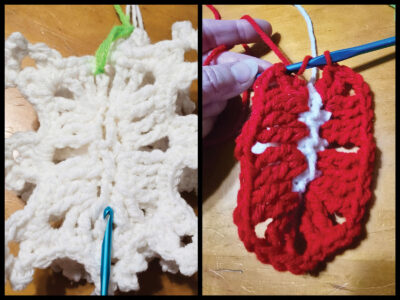
- A close-up of skipped Dc stitches (Photo by Maurita Way)
-
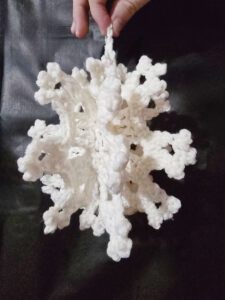
- A finished hanging snowflake, (Photo by Maurita Way)
-
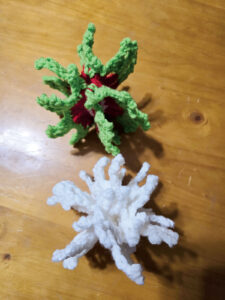
- A pair of completed hanging snowflakes. (Photo by Maurita Way)
-
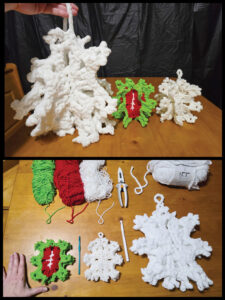
- Completed snowflakes: regular, multicolor and blanket yarn. (Photo by Maurita Way)
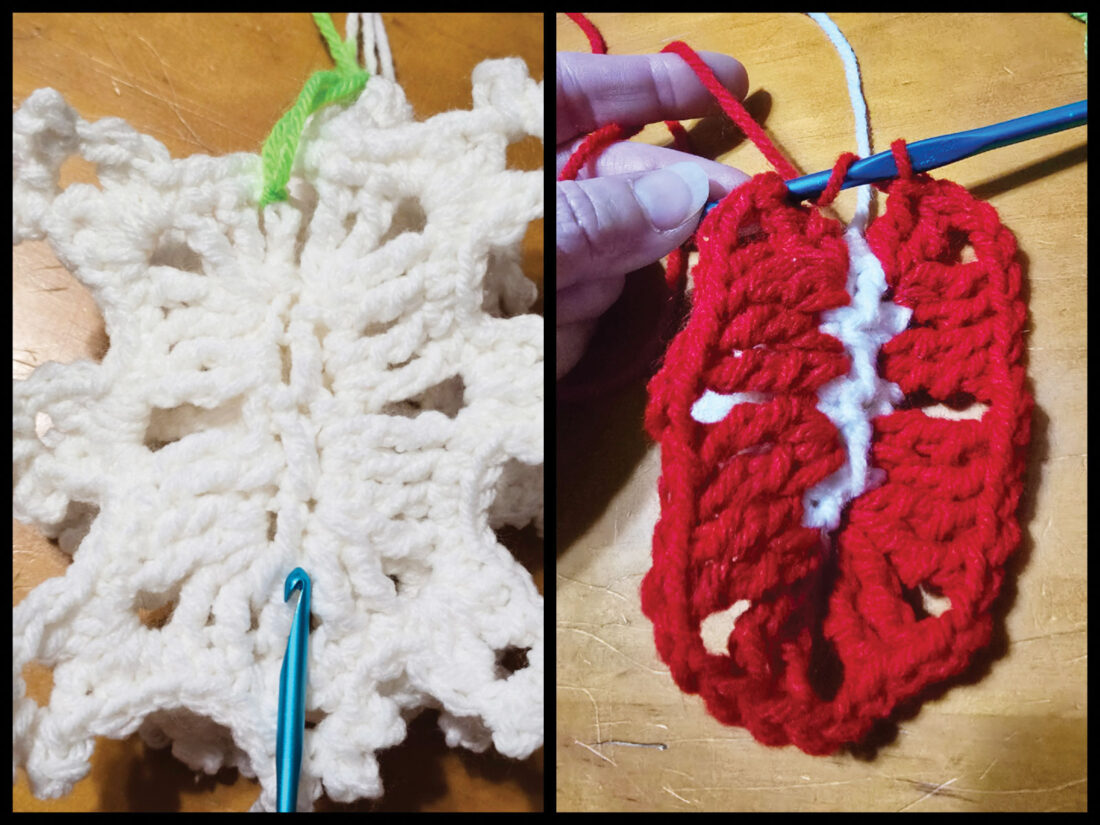
A close-up of skipped Dc stitches (Photo by Maurita Way)
Welcome back, crochet buddies. I hope everyone is ready to be creative this holiday season. I am so excited to share my huge decorating idea… Abominable 3D Snowflakes.
I used worsted weight yarn so they will be big. Just for fun, I tested it in blanket yarn. My first was floppy. I think adding a bit of fiberfill stuffing in an old sock (or whatever) inside the center part of the snowflake will make it sort of like a pillow to gently toss around for a holiday game.
To create the 3D shape, a ball will be crocheted, then you will work two zig-zag rows around the stitches of the ball. These rows actually form what I am calling ridges. There will be six ridges: 1st, 3rd, and 5th will actually go down the snowflake, while 2nd, 4th, and 6th will be crocheted up the snowflake. I recommend putting a stitch marker or a scrap of yarn in a different color at the top to help keep track of which direction you are going.
MATERIALS: Snowflake size small = crochet cotton size10 with size 7 steel hook (optional: starch)
Snowflake hand size = worsted weight yarn with size H 5mm hook
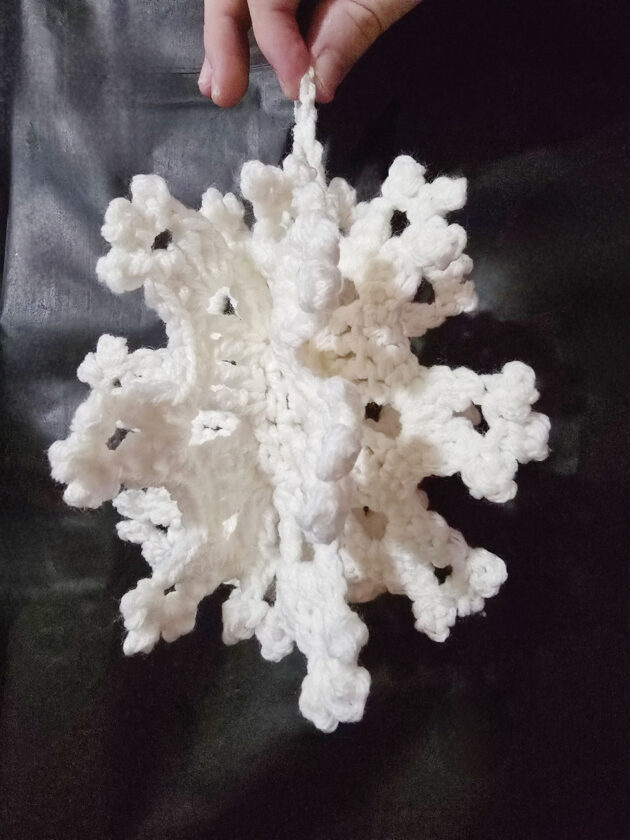
A finished hanging snowflake, (Photo by Maurita Way)
Snowflake size huge = blanket or thicker yarn with hook to match.
STITCHES: Ch. Sl st. 1st Trc= chain3. 1st Dc= chain2. Trc. Dc. Dc-Dec. Sc. PICOT= chain3, slip stitch in 1st ch.
DIRECTIONS:
CENTER BASE: RING: ch4, slip stitch to for ring. Rnd1: 12dc, join with slip stitch. Rnd2-3: dc in each stitch around, join. Rnd4: ch1 (ignore this chain), dc-dec round, join, sc in 4th dc-dec to close gap, slip stitch over post of dc of Rnd4 below sc just made.
RIDGES: NOTES– 1: Next two rows will zigzag over “center base” to make 6 ridges. 2: There will be one dc up&down line left unworked between ridges on center base so snowflake expands. 3: Stitches will be worked over the post of double crochet stitches of center base. 4: Spikes of Row2 will be above the ch-2 spaces of Row1. 5: (Parentheses) = worked in one stitch or space. 6: [ to ] = repeats a section of directions.

A pair of completed hanging snowflakes. (Photo by Maurita Way)
ROW1: Mark first stitch- [(2Trc, ch2, 2Trc), (2Trc), ch2, (2Trc), (2Trc, ch2, 2Trc), ch2, WORK WILL BE TURNED IN ZIGZAG PATTERN as follows: on 1st, 3rd, and 5th ridges- spin work “clockwise”… on 2nd, 4th, and 6th ridges- turn work. After work is turned for next ridge, skip next line of Dc stitches of center base]. REPEAT from [ to ] 5 times EXCEPT before last “ch2”, dc into 1st Trc or ch-2 space of previous completed ridge. EXPLANATION: After ridge1 and ridge2 are completed, Dc into 1st Trc to connect the ends of the ridge, then work the listed ch2. REPEAT on each ridge.
ROW2: This row is sc’s worked into each Trc and “spike” clusters worked into “ch-2” spaces.
[2Sc, SPIKE= (Sc, Dc, Trc, 3picot, Trc, Dc, Sc), 4Sc, Spike, 4Sc, Spike, 2Sc, follow spiral of ridges by spinning or turning work, in top ch-2 space that was created by either a Dc or ch-2: work a SMALL SPIKE: (Dc, 3picot, Dc)]. REPEAT from [ to ] 5 times.
HANGER: after last “small spike,” Sc in 1st Sc of Row2, ch12, slip stitch in 5th chain, ch5, Sc in ch-2 space across opening on top of snowflake. Fasten off and hide yarn tails.
I hope my photos will help you see what my words tried to describe. Have fun crocheting these huge 3D snowflakes. I bet they will look amazing in bright colors too. Until next time…

Completed snowflakes: regular, multicolor and blanket yarn. (Photo by Maurita Way)
Local columns

The Dunwich Hoarder: The race is on to stop a killer in Rebecca Zanetti’s ‘You Can Scream’

The Crochet Lady: How to flake it ’til you make it with this fun seasonal project

Cracking the Code: Hope fore a bright future is no myth

Editor’s Notes: Great educational expectations

Mid-Ohio Valley Climate Corner: COP 30 – not all the news was bad
