
The Crochet Lady: Hang in there with this simple holiday stocking project
(Photo by Maurita Way)
(Photo by Maurita Way)
(Photo by Maurita Way)
(Photo by Maurita Way)
(Photo by Maurita Way)
(Photo by Maurita Way)
Trending
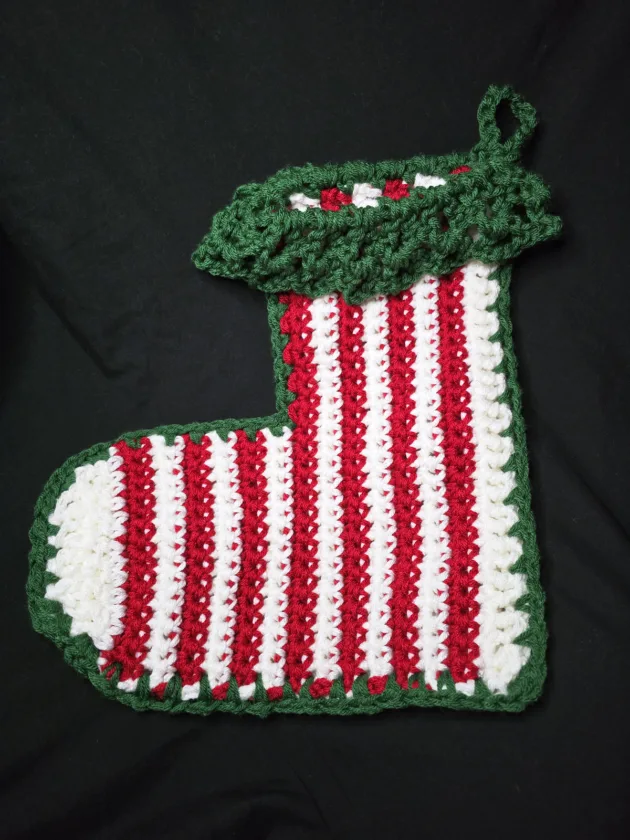
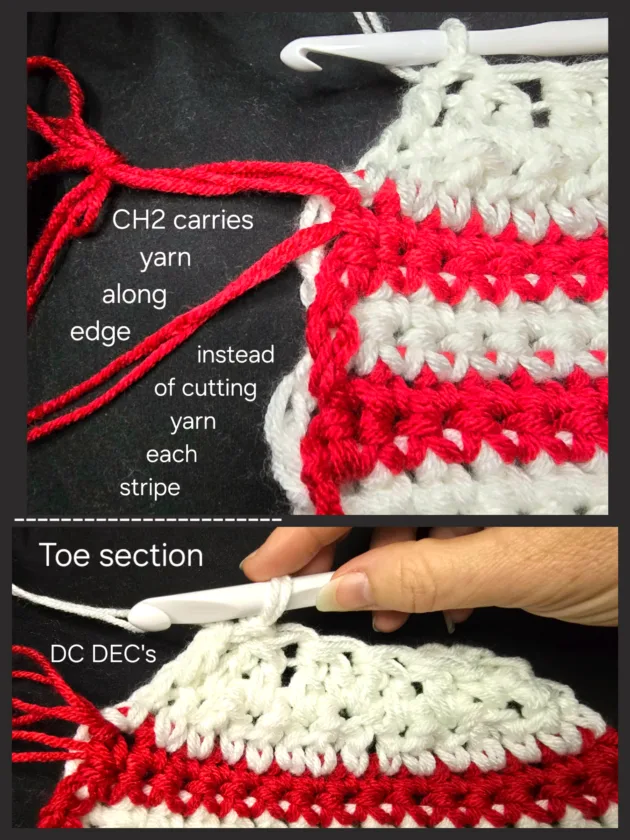
Hello my crochet buddies. Maurita the Crochet Lady here again. This month I wrote a simple but fun holiday stocking pattern. I made it using two strands of worsted weight yarn and N size hook. It can be made using single strand of yarn and whatever size hook you choose. H size is my normal go to size. The cuff is optional but I think it adds a jester type look. To make the stripes, I chose to loosely CH2 with secondary color then SL ST to be in the correct spot to start the next row INSTEAD of cutting yarn each time. I also pull the loop up from the hook to tie a temporary slip knot or fasten with stitch marker so no stitches of color put on 'hold' come undone while working the second color.
Stitches: CH= chain. SLST= slip stitch. SC= single crochet. DC= double crochet. DC DEC= double crochet decrease. (...to ...) = work the direction all in one stitch or space plus repeat if directed. V-ST = (DC, CH3, DC) all in one stitch.
Instructions: body piece – make 2.
NOTES: When swapping colors for body of project after first four ROWS are completed -- first color goes on 'hold' in stitch marker, second color is joined with SL ST, CH2, turn work, SL ST to join where first stitch should go, then continue work normally.
Base chain & Row 1 (white yarn): CH31, SC in 2nd CH from hook, SC across. (30SC total).
ROW 2: CH1 (ignore), turn work, SC in current and each stitch across.
ROW 3 (red yarn): Join with SL ST, CH1 (ignore), SC in current stitch and in each across.
ROW 4: CH1 (ignore), turn work, SC in current stitch and each across.
Rows 1-4 are repeated to have four stripe pairs.
Rows for toe section of stocking -- work same as main rows EXCEPT only work first 15 stitches leaving remaining stitches unworked ... repeat to have 3 stripe pairs.
TOE SECTION: (white yarn)
ROW 1: Ch2, turn, 3DC DEC, DC, 3DC DEC, DC.
ROW 2: CH2, turn, 2DC DEC, start next DC DEC in same stitch as last decrease, DC DEC, DC.
FASTEN OFF both colors , knot, then hide yarn tails.
BORDER: (green yarn): Note: Line up front and back stocking pieces. I tend to use stitch markers or yarn scraps to make sure corners and middle of sides stayed lined up as I crochet.
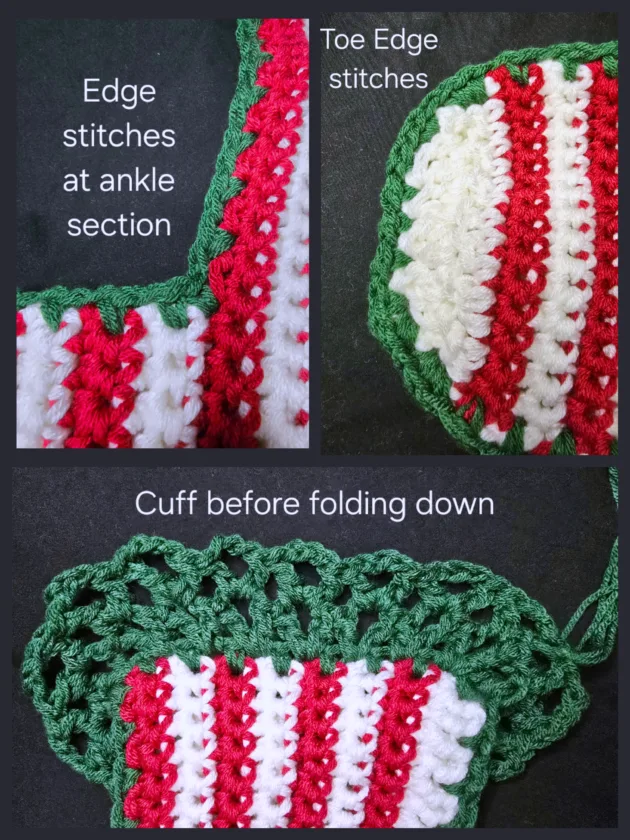
RND 1: At top of ankle above toe section: Join with SL ST, CH1 (ignore), SC in same stitch, loosely CH1, skip ST, (SC, loosely CH1, skip 1ST, work around to bend of ankle, do not CH1 at bend, continue from ( ...to...) to rounded toe, work 3sd at beginning and end of curve, continue from ( ...to...) until corner of heal, 3SC in corner stitch. Continue in the same way until at top of ankle, work from ( ...to...) around the top border of the ankle WITHOUT joining front and back pieces, join with SL ST.
HANGER: loosely CH10, SL ST in same stitch.
CUFF: NOTES: Beginning CH5= first DC and CH3 for space. V-ST is worked into Ch-1 space of previous round.
RND1: CH1, SL ST in first SC of previous RND and in CH-1 space of top border, CH5, DC in same stitch, V-ST around, make sure hanger is on inside of stocking opening, join with SL ST.
RND2: CH1, SL ST in CH-3 space of RND1, repeat RND1 if cuff working into CH-3 spaces, join with SL ST. Fasten Off and hide yarn tails.
I hope you enjoy creating and filling these holiday stockings. Until next time, HAPPY CROCHETING.