
Wastin’ Time: Some bright ideas for anyone who ‘wood’ like to craft their own lamp
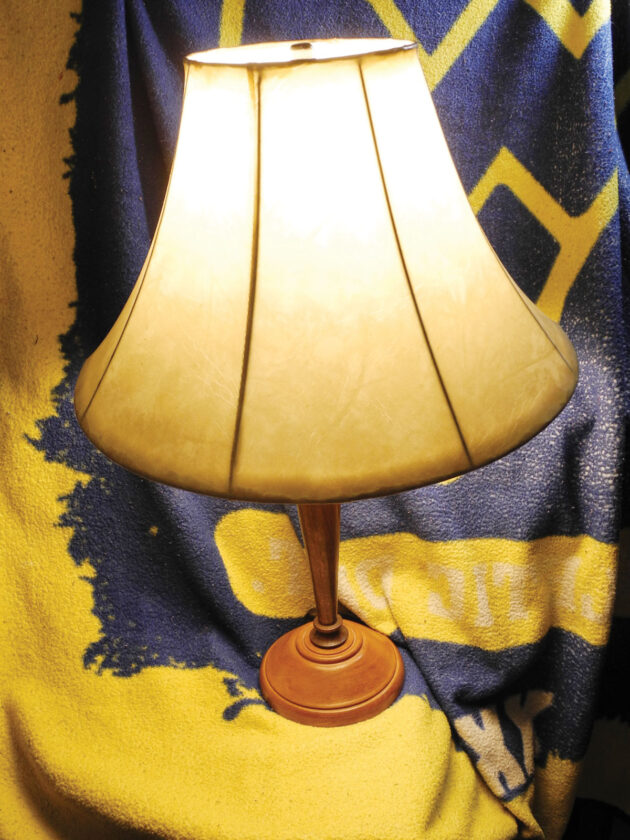
The finished lamp with shade in working order. I recommend LED bulbs, but those may be all you can buy now. The lamp parts are available most anywhere. I got mine at Lowes. (Photo by Jess Mancini)
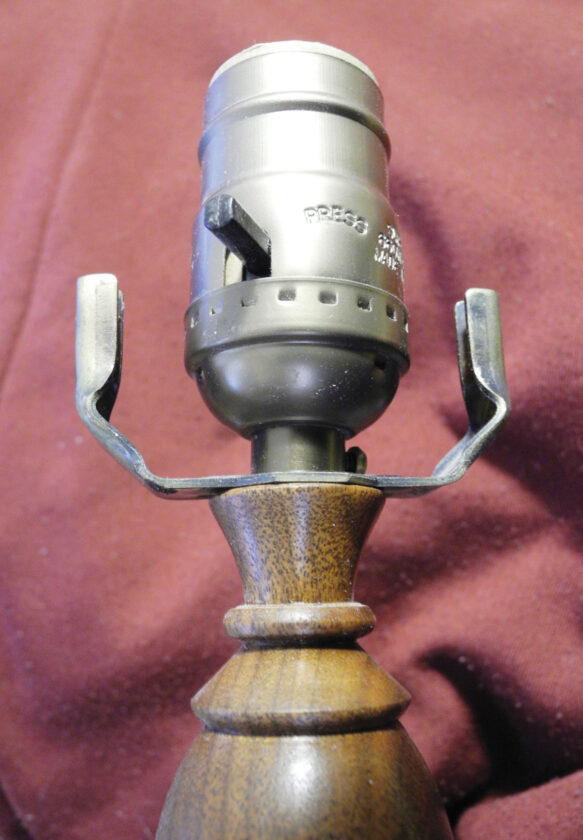
The top of the lamp where the assembly meets the wood. A three-eighths inch hole is drilled through the length of the blank for the wire. (Photo by Jess Mancini)
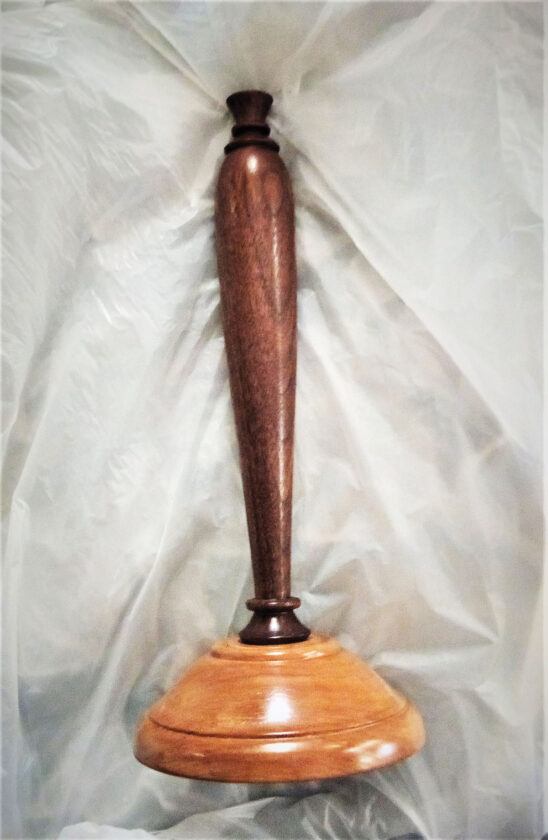
The assembled lamp minus the electrical parts. The base and stem are connected by a simple mortise and tenon turned on the lathe. The stem is walnut and the base is cherry. In hindsight, I should have used either maple or walnut for the base. (Photo by Jess Mancini)
The finished lamp with shade in working order. I recommend LED bulbs, but those may be all you can buy now. The lamp parts are available most anywhere. I got mine at Lowes. (Photo by Jess Mancini)
The top of the lamp where the assembly meets the wood. A three-eighths inch hole is drilled through the length of the blank for the wire. (Photo by Jess Mancini)
The assembled lamp minus the electrical parts. The base and stem are connected by a simple mortise and tenon turned on the lathe. The stem is walnut and the base is cherry. In hindsight, I should have used either maple or walnut for the base. (Photo by Jess Mancini)
Trending
Among my favorite lathe projects is a lamp. They're not difficult, but I recommend proficiency in using a skew chisel. Turning a lamp is basically turning a spindle. I may incur the wrath of bowl turners, but I believe spindle turning requires a different skill set, and I'll let it go at that.
I started with a walnut blank about 2 inches square and 15 inches long. Walnut is a beautiful wood and plentiful around here. The base is cherry. Should have been maple, but I had cherry lying around.
The walnut blank was mounted with a chuck on the drive side and a live center on the tailstock. I turned a tenon on the tailstock end to fit in my chuck. I then mounted the blank on the tenon side to the chuck and removed the point to the live center, which allows the 24-inch long 3/8 inch bit through the tail stock and into the blank. The hole is for the wire from the bottom to the top where the lamp parts are attached.
This is not difficult, but you must take care to clean the cuttings from the hole after drilling an inch or two. This is important to make sure the bit doesn't seize or gets so hot it causes a fire. It will get hot and smoke is not unusual. Beeswax on the cutting end of the bit helps. I hold the bit with a vice grip, and I don't have to remind you that the bit must be sharp. I would tell you how to sharpen bits, but it's always trial and error with me. My dad would take a bit to a grinding wheel and zip zap it's sharp. Me? I need a computer-assisted grinder.
After the hole is drilled through to the end, I turn the blank around and mount the tailstock end to the chuck and the other end to the live center with the point re-attached. In this way, if the bit goes off course and off center, the blank will be turned parallel to the hole. Wood is not consistent and the bits will travel the path of least resistance.
Now it becomes a matter of turning a spindle.
The top of the blank will be the top of the lamp. I turned the lamp round to a cylinder, then squared the tailstock end before turning a cove as a transition to the top where the lamp parts are attached. I used a spindle gouge on this part. My lamp resembles an upside down vase, the thickest part at the top and slendering down to where it is connected to a base.
I turned another transition from the top to the main body of the lamp.
Here is where the expertise with the skew is an advantage. I tapered the blank from the top to the bottom where I made another transition to the base, which is attached to the base with a tenon an inch in diameter. The skew when used properly makes a finish requiring little or no sanding.
After cutting the tenon, part the turned blank and put it off to the side. This would be a good time to apply sanding sealer.
Next is the base.
I drilled a hole to the base of the cherry blank. I used the largest Forstner bit I had, about 3 inches, and drilled a hole deep enough to enclose the wires. I then drilled a 1 inch through the blank for the tenon. The larger also is where the blank will be attached to the chuck. The cherry blank is about 7-by-7-by-4 inches. I used a round nose scraper to make the fancy moldings on the edges. I think a bowl gouge would have been better, but I don't have a bowl gouge because I don't turn bowls.
It is important at this point to undercut the bottom of the base so it will sit flat on the table. I drill an inch hole on the top of the base for the tenon on the lamp then some sanding before I removed the base from the lathe.
The base is not complete. I have to drill a hole from the side to the inside to feed the wire through. This is why I used the largest bit I had, so there would be plenty of room to feed the wire into the shaft of the lamp. I made a jig several years ago to drill a perpendicular hole in such a situation. The jig is two pieces of plywood butt-jointed to be perpendicular to each other, forming an L. I butt-jointed two strips of wood and attached them to the inside of the jig forming a V. The base fits inside the V and is held perpendicular while drilling the access hole for the cable,
After that was done I glued the tenon to the base. Another light sanding before three coats of lacquer are applied. The lamp is as smooth as a baby's butt.
Lamp parts are available from local hardware stores. The parts I used are from a cannibalized lamp from Restore in Vienna. If you're not sure about wiring or an assembly, get an electrician.
I got the lamp shade at Rinky Dinks Flea Market in Marietta. An LED light bulb is the bulb of choice and may be the only kind available.
***
Unless you think this column wasn't enough of a waste of time, send ideas for "Wastin' Time with Jess Mancini" to Jess Mancini at jmancini@newsandsentinel.com.